8.2.10 Other Tools - LUPMISManual
Main menu:
- 0. Introduction
- 1. GIS handling
-
2. GIS data entry
- 2.1 Create new layer
- 2.2 Digitize line
- 2.3 Digitize point
- 2.4 Digitize polygon
- 2.5 Edit existing layer
- 2.6 Delete feature
- 2.7 Split line
- 2.8 Split polygon
- 2.9 Merge lines from different layers
- 2.10 Unite lines
- 2.11 Snap lines
- 2.12 Join polygons
- 2.13 Extend polygon
- 2.14 Insert island
- 2.15 Define unit surrounding islands
- 2.16 Create 'doughnut'
- 2.17 Fill 'doughnut' polygon
- 2.18 Fill polygon with 'holes'
- 2.19 Digitize parcels from sector layout
-
3. GIS operations
- 3.1 Create buffer
- 3.2 Create exclusion zone
- 3.3 Overlay units
- 3.4 Convert line to polygon
- 3.5 Derive statistics (area size, length)
- 3.6 Clip unit according to other unit
- 3.7 Create geographic grid
- 3.8 Move entire vector map
- 3.9 Move or copy individual features on a map
- 3.10 Adjust polygon to line
- 3.11 Convert points to polygon
- 3.12 Define by distance
- 3.13 Create multiple objects
- 3.14 Transfer styles from one layer to another
-
4. Attribute database
- 4.1 Start with database
- 4.2 Import database
- 4.3 Display database information
- 4.4 Enter attribute data
- 4.5 Attribute matrix of multiple layers
- 4.6 Seeds
- 4.7 Repair attribute data
- 4.8 Merge lines with attached database
- 4.9 Transfer attribute data from points to polygons
- 4.10 Copy styles, labels, attributes
-
5. Conversion of data
-
5.1 Points
- 5.1.1 Import list of points from text file
- 5.1.2 Import list of points from Excel file
- 5.1.3 Convert point coordinates between projections
- 5.1.4 Convert point coordinates from Ghana War Office (feet)
- 5.1.5 Convert point coordinates from Ghana Clark 1880 (feet)
- 5.1.6 Track with GPS
- 5.1.7 Download GPS track from Garmin
- 5.1.8 Download GPS track from PDA
- 5.1.9 Frequency analysis of points
- 5.2 Vector maps
- 5.3 Raster maps
-
5.4 Communication with other GIS programs
- 5.4.1 Import GIS data from SHP format
- 5.4.2 Import GIS data from E00 format
- 5.4.3 Import GIS data from AutoCAD
- 5.4.4 Export LUPMIS data to other programs
- 5.4.5 Export GIS to AutoCAD
- 5.4.6 Change a shape file to GPX
- 5.4.7 Transfer GIS data to other LUPMIS installations
- 5.4.8 Digitize lines in Google Earth
- 5.5 Terrain data
- 5.6 Export to tables
- 5.7 Density map
-
5.1 Points
-
6. Presentation
- 6.1 Labels
- 6.2 Styles and Symbols
- 6.3 Marginalia
- 6.4 Legend
- 6.5 Map template
- 6.6 Final print
- 6.7 Print to file
- 6.8 3D visualization
- 6.9 External display of features
- 6.10 Google
-
7. GIS for land use planning
- 7.1 Introduction to land use planning
- 7.2 Land use mapping for Structure Plan
- 7.3 Detail mapping for Local Plan
- 7.4 Framework
- 7.5 Structure Plan
- 7.6 Local Plan
- 7.7 Follow-up plans from Local Plan
- 7.8 Land evaluation
-
8. LUPMIS Tools
- 8.1 General
- 8.2 Drawing Tools
- 8.3 Printing Tools
- 8.4 Permit Tools
- 8.5 Census Tools
-
8.6 Revenue Tools
- 8.6.1 Overview
- 8.6.2 Entry of revenue data
- 8.6.3 Retrieval of revenue data
- 8.6.4 Revenue maps
- 8.6.5 Other Revenue Tools
- 8.7 Reports Tools
- 8.8 Project Tools
-
9. Databases
- 9.1 Permit Database
-
9.2 Plans
- 9.2.1 Accra
- 9.2.2 Kasoa
- 9.2.3 Dodowa
- 9.2.4 Sekondi-Takoradi
- 9.3 Census Database
- 9.4 Revenue Database
- 9.5 Report Database
- 9.6 Project Database
-
Annexes 1-10
- A1. LUPMIS setup
- A2. Background to cartography/raster images
- A3. Glosssary
- A4. Troubleshooting
- A5. Styles
- A6. Classification for landuse mapping/planning
- A7. GIS utilities
- A8. Map projection parameters
- A9. Regions / Districts
- A 10. Standards
-
Annexes 11-20
- A11. LUPMIS distribution
- A12. Garmin GPS
- A13. Training
- A14. ArcView
- A15. Population statistics
- A16. Entry and display of survey data
- A17. External exercises
- A18. Programming
- A19. Paper sizes
- A20. Various IT advices
- A21. Site map and references
8.2.10 Other Tools
Level of expertise required for this Chapter: Intermediate; specifically for LUPMIS @ TCPD
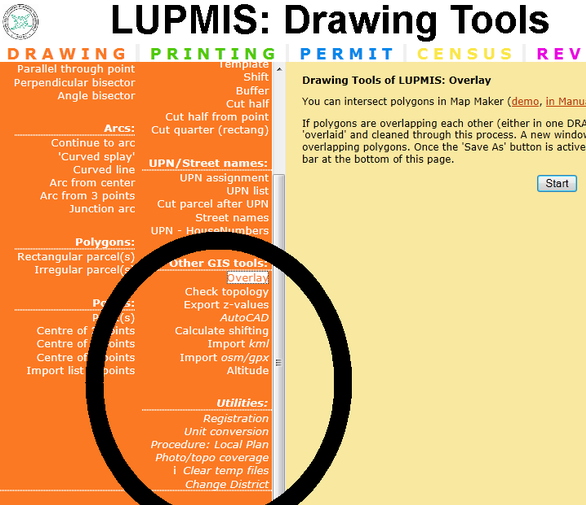
Following functions are available:
Overlay
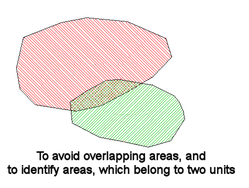
This is the preferred option to overlay polygons. (Do not use the Map Maker-inbuilt option). Press 'Start' and the next menu will show:
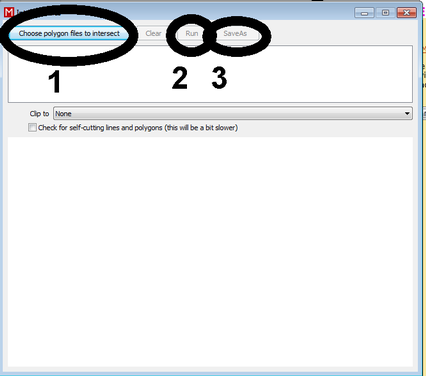
You first select the file / files to overlay (1), then run (2) and save the output (3). Be aware, that styles are not maintained.
This is also the fastest way to solve topology problems, related to polygon islands and multiple partly overlaying polygons.
See also example of street polygon overlay in Chapter 8.2.
Check topology
This Tool check the GIS topology of a DRA file.
Export z-values
You can convert a DRA file with z value, such as altitude or ..., to Excel for a 3-dimensional display in Excel (conversion of a file from raster with z values to a CSV file for import to Excel).
Technical Note 1: As requirement, the raster must be a complete matrix, with x and y values to be identical for each cell.
Technical Note 2: To create XYZ file from a line (contour) map, in Map Maker:
1. Prepare contour line map in Map Maker, with altitude in meters (numeric) in Display Labels
2. Utilities > 3D surface utilities > Create surface > from Contours > Select polygon DRA file > Settings > Save as DEM
3. Utilities > 3D surface utilities > Export surface > Surfer (xyz) > ...
AutoCAD
Because AutoCAD is not a GIS program, its drawings can not be imported directly into Map Maker. Conditions are not met (georeferencing, projection, polygon topology, snapping, layer structure).
Steps to import an AutoCAD map / layer into Map Maker are as described below. For full functionality, you must have 'Teigha' installed on your computer (available on LUPMIS Installation CD), and Map Maker configured for War Office.
1. Convert the DWG or DXF file into DXF file with format ASCI2000: Use the freeware Teigha.
2. Import the DXF file with selected layer to Map Maker: Vector Utilities > Import files > DXF
3. Check the projection. If it is in UTM 30, the process is complete.
3a. If the projection is in War Office feet, convert the file it from War Office feet to War Office meters: Live layer > Transformations > Convert feet to meters, and continue with the next step.
3b. If the projection is in War Office meters, convert the file from War Office to UTM 30: Latitude and longitude utilities > XY file to another projection.
See more explanations in Chapter 5.4.3.
For the transfer of planning data to the application of architectural design, it is useful to convert the planning GIS map or an individual parcel to AutoCAD through Utilities > Vector utilities > Export files > to DXF. You can then use AutoCAD for architectural design work.
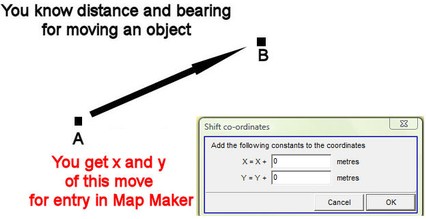
Calculate shifting
Import kml
- Soon to be explained here -
Download and Import OSM
Open Street Map (OSM) is a fast growing standard of open-source GIS data. With this Tool you can download OSM files and automatically converted them from lat/long to UTM. This Tool will access the OpenStreetMap online GIS database (through their API) and download all features for the defined area.
With the LUPMIS Drawing Tools: Import kml/osm [1] > Download and import OSM [2] >
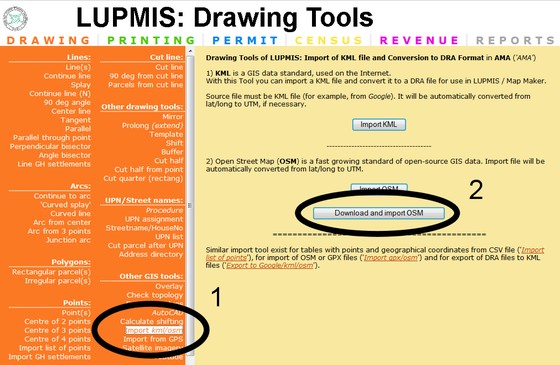
Define the area with minimum and maximum x and y [3]. OpenStreetMap limits the area to a maximum of 50 km, but also the number of features (currently, 50,000). If the area defined is too large or there are too many features, a message will tell you to decrease the size.
In the sample below, we are interested in all streets with their streetnames [4]:

'Continue' [5] to run the process, which might take a while for the download.
If you import street names, be aware, this is open-source data - not official. It is the Assembly which has the authority to define street names, not Google or a contributor to OpenStreetMap.
The result is a DRA line file, if selected with streetnames, from OpenStreetMap (very similar to Google data):

An alternative approach, if you already have the OSM file or want to download it directly from the Internet, is the 'Import OSM' option:
www.openstreetmap.com: Export [1] > Define the area of interest by zooming, paning or by lat/long figures in the entry box [2] > Export [3} > Define location and file name on your computer.

If the 'Export' button [3] does not appear or 'File not found', define a smaller area of interest, and repeat.
Altitude
- Soon to be explained here -
Unit Conversion
You can convert units in many different ways. One part covers conversions between projections.
A training video shows the conversion of one point from UTM 31 to UTM 30 and its display in the GIS (in YouTube).
Procedure: Local Plan
Photo / topo coverage
Clean temp file
- Soon to be explained here -
Change district
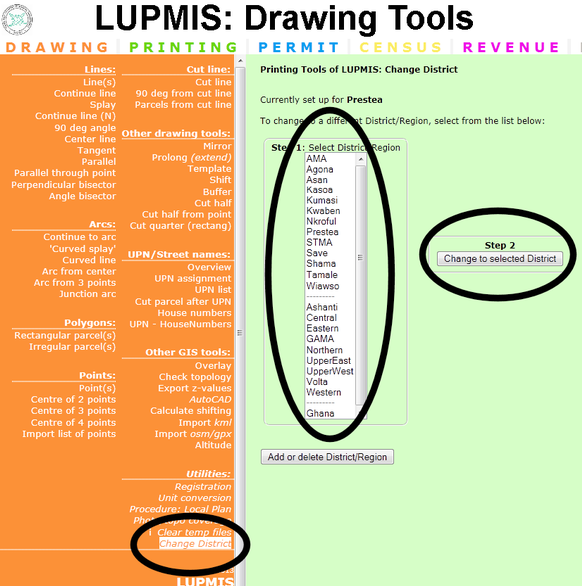
If you set up a new District (or Region), you should follow a sequence of data population procedures: See Annex 9.1.

